The Advent Garden
by Barbara Dewey
The season of Advent may be marked by the Advent Garden, created for the kindergarten and lower grades. Often held in late afternoon or in the early evening, the room will be dark and filled with a mood of wonder and quiet anticipation. Teachers lay out a large spiral path of evergreen boughs. In the center of the spiral they place a large white candle. Along the edges of the green spiral path they intersperse golden stars. The candle is lit. and stone crystals twinkle like stars on a dark night.
All is quiet. Each child in turn, holding a red apple with a small unlit candle inserted into it, slowly walks along the spiral path and lights the candle from the center light. On the return the child places the apple and candle on one of the golden stars. When all the children have had a turn, the garden path is aglow from all the smaller lights. In many Advent Gardens, lyre playing, where appropriate, helps to create a special mood. Sometimes the children and observing parents sing as the children proceed through the garden.
This celebration can be constructed in miniature on the nature table by gluing small pine greens in a spiral on a large piece of cardboard with little finger puppets or small dolls as the children and beads for the apples. An angel or large candle can be placed in the middle. Stars may be cut out of gold foil or paper and placed along the path to hold the bead/apples with their candles.
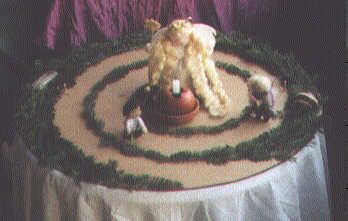
Advent garden made by Barbara and her grandson last Christmas
Holiday Ornament
One of my housemates at Sunbridge in Spring Valley, a eurythmy student, sent me one of these a few years ago after she returned to her home in Germany. To make it you will need double-sided poster board (colored on both sides) and string, yarn or preferably elastic thread. Ingrid made hers of dark blue poster board, used gold string, and wrote her message in gold gel pen on it. It is truly elegant.
Cut a circle out of the poster board. You can make it any size but it is best between 2” and 4” across. Then notch the edges in five places, evenly spaced. Now, here comes the hard part: wrap the yarn from one notch to another so that it forms a star on both sides. It is a bit of a puzzle but you will figure it out with a little trial and error, or your children will! Then tie a knot where the ends come together and make a loop with the extra string for hanging.